I just love burlap wreaths. They're such a good base for almost any embellishment you may want to add, and a single wreath could easily take you through all seasons of the year. Plus, they are super easy to create!
All that is needed is a wire wreath form (any size you like) and a roll or two of 4 inch burlap ribbon. I used just over 10 yards of ribbon.
Have a bunch of burlap, but not in 4 inch ribbon form? That's OK. You can use that too, but you'll have to cut your burlap into 4 inch wide strips. Here's an easy way to cut burlap so that it's perfectly straight. The ladies at Joann Fabrics showed it to me and it has made my life so much easier!
First lay your bolt of burlap out on a flat surface. I used a small piece to demonstrate, but you would want to use a larger piece in order to obtain long strips of burlap.
Measure over 4 inches from the edge and single out one thread of burlap. Pull that thread, allowing the material to bunch up, until you have completely removed that single thread from your burlap.
Once it is removed, you'll be left with a perfect line to cut, at exactly the width you desire. Cut along that line and voila! A perfectly straight edge.
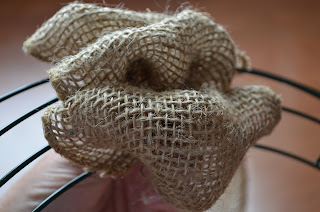
Ok, so whether you bought it or cut it, you have now 4 inch strips of burlap. Onto the wreath-making! Start by looping your burlap ribbon through each of the holes in your wire wreath form. I would describe it as making waves, where the top of your wave sticks out above the wreath form, and the bottom of the waves passes under each wire.
Once you have three 'waves', scrunch the ribbon together so it all bunches up.
Then, make three more waves right next to your first set and bunch again. I find it best to alternate the order of creating my waves. For example, in my first set I made the loop on the innermost ring, then the middle, then the outermost ring of the wreath form. For my second set of waves, I started with the outermost ring and worked my way in. Remember to bunch up your burlap after every set of 'waves' so that your wreath is is nice and tight. At first, you need to hold your burlap into place so it doesn't fall out of your wreath form, but after two or three sets of 'waves' it just stays put by itself.
Work your way around the wreath form....
..until you complete the circle. When you are done, cut your ribbon and tuck the end in so that it is not visible. That's it!
Now embellish that baby until your heart's content! I like to pin or tie my embellishments on, so that they are easily swapped.
What do you think? Will you try a burlap wreath?
Linking Up At


Great job! Don't forget to link up to The DIY'ers! http://homecomingmn.blogspot.com/2013/09/the-diyers-27.html
ReplyDeleteDone! Great blog!
DeleteThanks! I can't wait to do this tomorrow. Got all my supplies ready :) PS- You have the best instructions I've found so far ;)
ReplyDeleteOh that's so nice to hear! Feel free to pin or share the post, we love new readers around here! I'd love if you posted a pic of the finished product to the House in the Heights Facebook page!
DeleteI have admired wreaths like this one around blogland, but have never made one myself. Now I can! Thanks so much for the tut! And thank you for linking up at Get Your DIY On! I hope to see you back on Sunday at 7pm EST to link up your furniture transformations! Hope you're having a wonderful week!
ReplyDelete~Abby =)