Thursday, July 11, 2013

Evolution of Our Home: Dining Room Edition

Here's our dining room as it stands now.  Like all rooms in our house, it is a work in progress, but so far I'm loving it!

But, before we pay any further attention to the present, let's take a look at where this room has been...

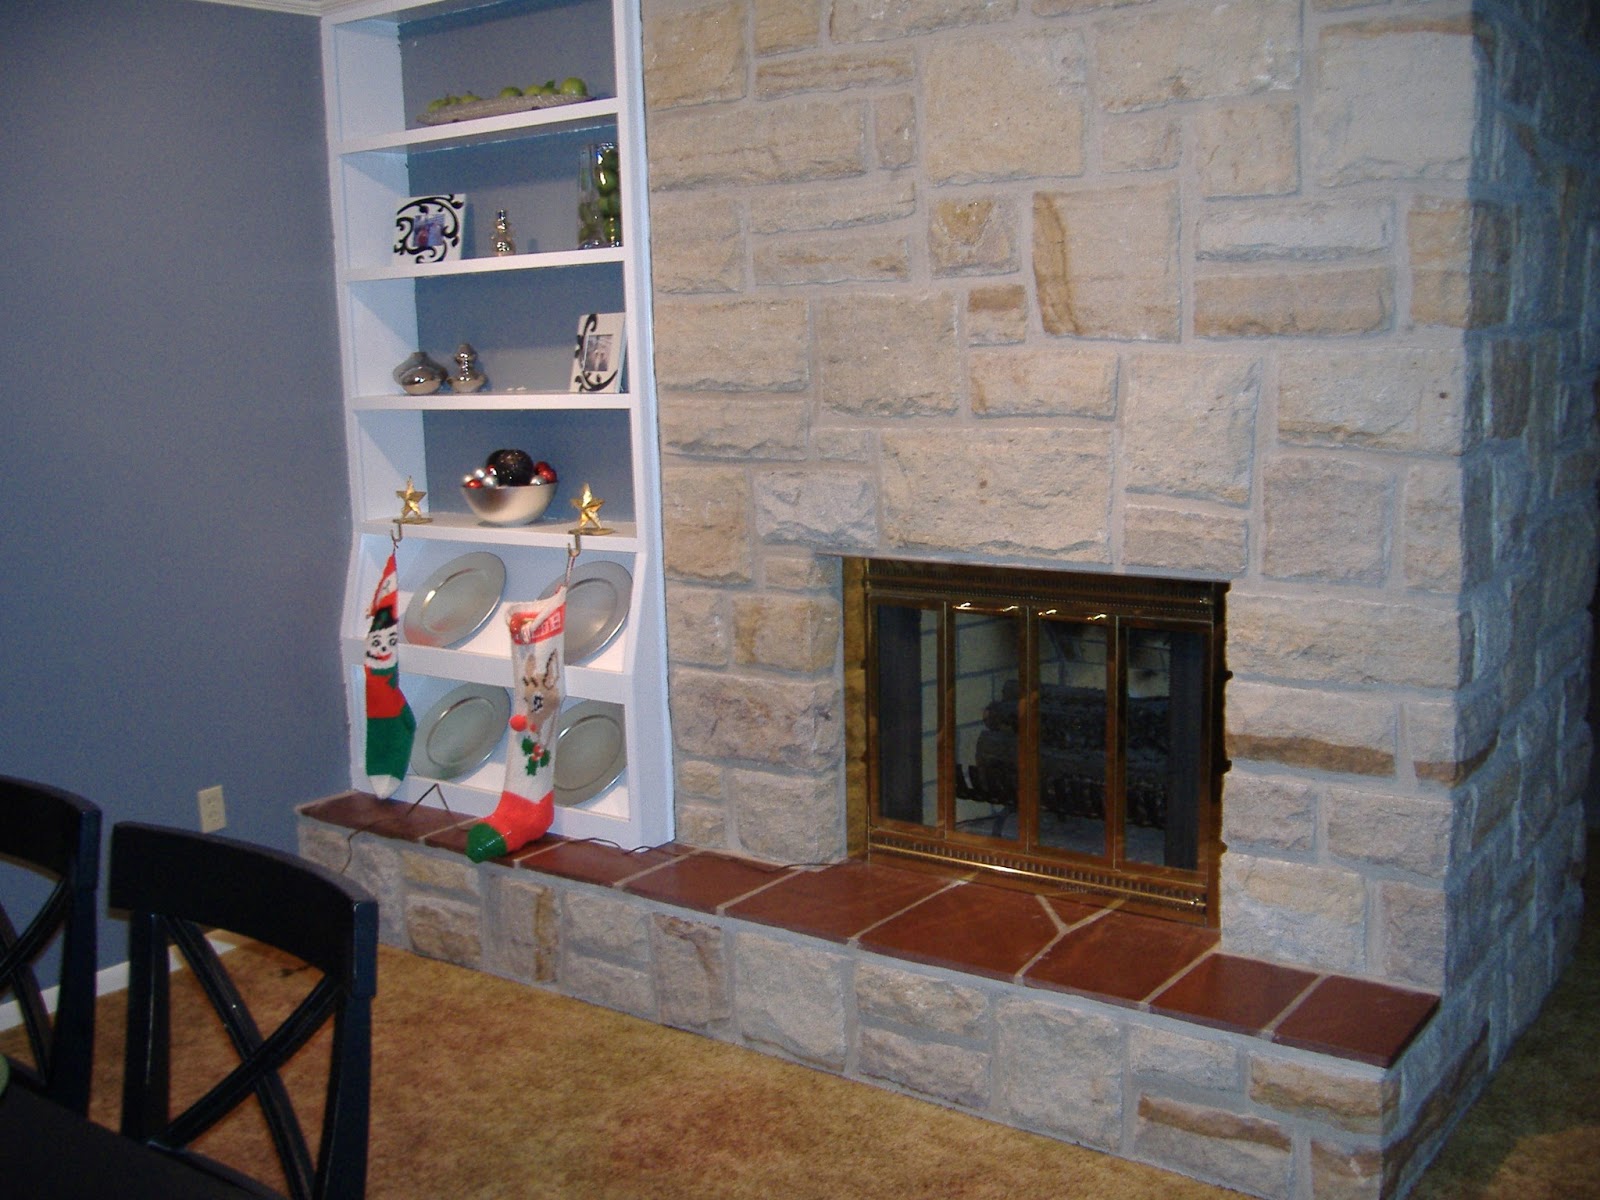
The year: 2009. The room: dining. The color: golden brown.  Something needed to be done.


 Look, I found a shot of that accordion door I told you about in my post about how our living room has changed!  Its the far left side of the picture above.
 Sorry for the blurry pictures.  I'm just glad I have ANY pictures, as I took these before House in the Heights was even an idea in my mind.

The first thing we did was peel off the wallpaper patterned with golden strands of wheat.  Here's a shot of the room with the wallpaper partially removed.

While the dining room was not the first room in the house to undergo wallpaper removal (nearly the entire house was wallpapered), it was the first room in which we endured difficult wallpaper removal.  My usual technique of spraying a fabric softener and water mixture onto portions of the wall and then using my hands and a scraper to pull the paper from the wall worked....a little too well.  On large sections of the wall the drywall came off along with the paper, leaving large rough patches.  My husband had to undertake a major re-spackling project in order to repair the surface of the walls to a smooth and blemish-free state.  I'm not sure why this happened, but I think it must have had something to do with either the wallpaper or the glue used in this room.  We did not have this problem in any of the many other rooms in which we used this wallpaper removal technique (although we did have some OTHER wallpaper removal problems that I will get to once I show you those rooms!). 

Once the wall paper was off, we patched any holes we found, sanded the walls to perfection, used tack cloth to remove the sand paper dust and got to work with paint. We painted the bookcases white and the walls gray (True Value paint in Wizardry).  If I'm being honest, the gray color takes on more of a blue undertone than I had envisioned. It seems to depend on how the lights hits it.  Maybe someday I will repaint it another shade of gray with less of a blue in it.


We also replaced this beauty with a chandelier.


But once again, the real changes happened once we ripped out the old carpet and replaced it with Pergo.


Which pretty much brings us up to where we are now. 
 That's an area rug that we are no longer using rolled up in the  bottom right corner. Its not usually there.  Please try to ignore it, I really didn't want to get my camera back out for more pictures!


Some of the decorative accents in this room, like the wall of plates and the magazine racks, are deserving of more detail.  So I'll cover them in a separate post.  Stay tuned for that!

I'll leave you with the dirty little secret of our dining room, as well as a wish list of what else I'd like to do in here:

Secret: We use the cubby space underneath the buffet in the dining room to corral our cat toys.  Bron (left) and Guma (right) LOVE their toys, so once a day we walk around the house picking up everything they've gotten out and put them back in the baskets.  Not the most traditional use of space in a dining room, but at least they are out of the way!

Dining Room Wish List
-Have fireplace converted to gas burning
-Replace fireplace surround with something silver and more modern
-Update the buffet area (new countertop, some sort of shiny backsplash, paint cabinets?)
-Find a mantle for the fireplace (for some reason, I think a rustic, unfinished beam of wood would be a cool juxtaposition with some of the more modern, sparkly, shiny elements in here ) 
-Find an 8x8 area rug for under the table (area rugs in that size, that are the right style/color, and are the right price have been IMPOSSIBLE to find!)


What are some 'wish list items' that you have for YOUR house?


Monday, July 8, 2013

Gilded Picture Frames

Last week I showed how our living room has evolved over the four years we have lived in our home.  The post made me realize that the shelves on either side of the TV could use some lighter, brighter items to pop off the red wall. An idea was born...


Here are the frames that I started with, as well as some shots of them on the shelves.  Nothing wrong with them, they just needed something to make them stand out a little more.


So, I grabbed my trusty spray paint, a roll of painter's tape, and set out on my mission.  First, I removed the pictures and taped off the back of the frames and the area where the picture sits, and then I painted each with two coats of off-white spray paint.

Once the off-white paint was dry (not tacky to the touch AT ALL), I used the painter's tape to cover the areas that I wanted to remain off-white.  For the smaller frame, I color blocked along the planes of the frame, and on the larger frame, I just taped off diagonal stripes.


Next, I sprayed two coats of metallic gold Rustoleum spray paint onto each frame.  The larger frame was coated beautifully, but the smaller frame looked like this in one corner.


Hmmm. Not sure what happened there.  Maybe I sprayed too much paint in one spot, breaking the all-important 'multiple thin coats are much better than one thick coat' rule of spray painting??  The paint wasn't really cracked, it just bunched up together in one spot, creating a crackled look.  It was kind of cool!  If only it hadn't happened in just one spot...

So, I went back outside and sprayed 'too much' in a few other spots on the frame.  The same thing happened!  Now it looked like the crackle finish was intentional, and gave the frame some interest.  Crisis averted.

I carefully pulled the painter's tape from the frames as soon as I finished spraying the gold paint, because I was afraid that it would remove the gold paint if I waited until it dried.  Finally, I sprayed both frames with a clear acrylic spray to protect the paint job and make them more chip-resistant.


Fabulous. Easy.  And free, since I already had all of the supplies I needed.  My favorite kind of project.  Stay tuned, because I have some BIG plans for the rest of that gold spray paint (and the other six cans occupying the shelf in our garage). 


What items in your home have you given new life?  Do tell!

Linking up at


Saturday, July 6, 2013

Patio Botox

Our patio table needed a facelift. Well, maybe I can't call this project a full 'facelift', as it was quick, cheap, and meant to 'smooth out the wrinkles' in order to maintain the youthful appearance of the table.  I guess this was more like a patio table botox injection.

The table itself is pretty old, handed down to us in the Great Patio Furniture Switch of 2010, where my parents got new patio furniture, gave us their old stuff, and we in turn gave our high top bistro set to my brother and his wife.  A bunch of things in our home have been handed down to us from our families, leading me to term our décor style Castoff Chic. 


Anyway, the patio table is all metal, and the rust was starting to wear through, giving the otherwise green table a brown rusty sheen, depending upon the angle from which you viewed it.  See?


Nothing a little spray paint couldn't fix.

I love spray paint.  It almost makes me giddy that I can so easily change the appearance of something that I'm tired of into something fresh, new, and lovable again.  I love it so much that I bought seven cans of it this week, in preparation for a soon-to-be-revealed project.  Get excited, people. I know that I am!

So, I dragged the table out into the yard, gave it a quick once over with a wire brush to remove any loose paint, dirt, and cobwebs that may have clung to it. A quick spray with the hose to clean off any remaining debris was all that was needed before I was ready to spray away.

While it was empty, I also gave the patio a good cleaning with the hose.  It's amazing how much dirt spider webs dead bugs, crap accumulates in such short periods of time.  In fact, that's one of the reasons that I've resisted using outdoor cushions, pillows, rugs, and other items that I see others using in their outdoor spaces.  How do people keep all of those things clean, dry, and mildew free?  If there's a secret, I'd love to know it, because I think those accessories look great! But, there's no way that I'm bringing all of that in every time it rains,  and they seem to be a collecting place for dead bugs, leaves, or dirt, so I just skip them all together.  I'll admit, I do have a serious case of patio envy whenever I see a space that is basically an outdoor living room, though.


I used green Rustoleum spray paint, and was pleased with how quickly it covered the rust spots.  It took two coats, and each one took only about 15 minutes to dry.  What a difference it made!!  Spray paint, I love you. Our table is like new again :)


While I was at it, I also touched up the paint on the chairs that sit just outside our sliding door.  They too had rust spots, but I couldn't simply spray paint the whole chair because they have a plastic basket weave that makes up the seat and back of the chair.  So I just used my drop cloths to shield the areas that I didn't want the paint to reach and carefully spot-sprayed them.  I didn't think to take before pictures, but trust me, they look a lot better too.


Here's the full on post-botox patio shot.  I got a little more adventurous with my potted plants this year.  More on that later.


Have you 'botoxed' any items in your home in order to make them like new again?  Tell me about it!

Wednesday, July 3, 2013

Shopping Recap: Summer Clearance

There hasn't been much sunshine around here this week, so it seemed like the perfect time to take a day away from my summer job of getting an amazing tan and spend a day searching out some deals. (Have I mentioned that I have summers off from work?  It's fabulous!)  It seems like all of the stores start to dump their summer merchandise around the 4th of July, so off I went looking for some deals to call my own. 

And find them I did!!  This is not a fashion blog, so I won't go too far into the clothes that I found.  But I WILL tell you that I bought three sweaters at JC Penny (left over from last winter, I guess) that were $1.97.  One dollar and ninety-seven cents, people! Would I have paid full price for them?  No.  But, are they cozy, cute and perfect for pairing with leggings and boots to run around town this fall/winter?  Absolutely!  I also got an emerald green blazer for less than 20 bucks.  Amazing.

Before we get on to the stuff that I actually bought, and while we are still on the topic of JC Penny, has anyone checked out their home store lately?!  Traditionally the merchandise they stock in their home department is not really my thing.  Traditional styles, muted colors....just not really my style.  However, they must have re-vamped their approach to home décor, because I found some awesome stuff this time around!!  I actually didn't buy anything because I was in search of deals, and this must all be new merchandise, which equals no sales.  But there are definitely some things that I'll be keeping my eye on!


I love this watercolor pillow.  They also had some in red/pink tones, and in a smaller, more rectangular shape. 

They also had a whole section of the store dedicated to Jonathan Adler designed home décor items called Happy Chic.  I found a lot that I loved, but did not find anything that was the right fit for my needs right now.  Here are some of my favs.


Then it was on to Target, and let me tell you, there were some DEALS to be found!  You should go people, because there is no way these deals are going to last.  I'm not kidding.  Read the rest of this post and GO NOW!  You'll thank me!

Everyone knows the end caps of the aisles are the places to find the deals in Target. So naturally, that is where I found the mother load of Nate Berkus collection clearance items. 


As you can see, these copper-dipped vases were $2.98 each.  What?!


I also found this amazing gold chevron box for only $3.88.  Gold. Chevron. Natural wood. Need I say more?  I had actually eyed up this box when it was full-price.  I'm so glad I waited!  Maybe I should have bought two?


There was also this Nate Berkus gold, riveted lamp base that was marked below $15.  I debated getting it, but wasn't sure that I would be able to find a shade for it, so I held off.  I looked at it again online and found that Target.com has it listed for $42.48 (originally $49.99).  Now I'm sort of regretting that I didn't buy! 

Last, but certainly not least, in the amazing deals department was Target's outdoor and patio section.  There were some amazing finds here, and I found this chartreuse lantern for only $4.48.  They also had other colors (turquoise, hot pink, orange) and shapes on clearance as well as flameless candles that would look perfect inside any of the clearance lanterns. 


Finally, it was home to figure out how to incorporate these amazing finds into our home.  The copper and gold accents were a natural fit on the shelves in our family room.


I really debated about where to use the chartreuse lantern.  Part of me wanted to use it on the patio or the front porch, but I knew that it would also look good in our dining room, which filled with grey, black, white, and chartreuse (I'll show it to you eventually, I promise!).  In the end, the dining room won out, and I used the lantern as fun way to store and display some of my ever-accumulating wine corks. 


Now go out and find some summer clearance sales!  Just be sure to come back here and share with me what you find.  Someone needs to snatch up that sub-$15 gold lamp base.  I'll feel much better about passing on it if one of you could bring it home.

Where have you found amazing summer clearance sales?  I could be pretty easily convinced to make another trip if you share some good tips!

Monday, July 1, 2013

Evolution of our Home: Family Room Edition

When we bought our house in 2009, the family room was one of the spaces that most intimidated me most.  And by intimidated, I mean I was afraid cried  on the day we closed on the house because I was overwhelmed by all of the cosmetic changes that needed to happen in order to make this house a home that I loved.  Did we have time, money, and skills to do all of this?  I was worried. In typical fashion, my husband was not.

The family room scared me because it had an odd layout, with so many built-in cabinets I wasn't sure how our furniture could be arranged.  It had two different types of carpet, in fact it had two different types of ceiling! The built in cabinets were topped with glass-front display cases, bringing back memories of middle school science class. It even had one of those old accordion doors separating it from the room next door, that was to become our dining room. You know, the kind that were used in older schools to separate two adjoining classrooms or halves of the gym?  Basically, the whole house was bringing back memories of middle school.  No wonder I was so scared.

 Here are some 'before' pictures to help you understand my concerns. I wish I had taken more angles, so that I could show you the accordion door, because then you might truly understand!


That's not to say that this room didn't have any redeeming qualities. As you can see above, one whole wall is made of stone and has a window that connects the family room to our kitchen. It used to be an exterior wall, but when the couple that built the home enclosed their patio, it became a part of the family room.  Plus, look at all of those windows!  And there's this cool lighting fixture they installed.  It's so unique.  I love it!


My husband had the idea to knock out the divider between the middle two display cases, and to remove the shelves in order to create a space to house our TV.  He did such a great job, and the finished product looks like a built-in entertainment center.  The cabinets below house our DVR, DVD collection, and much more!

We also painted the walls red (yes, the same color red that we painted the front door and yes, I do use other colors in our home). The paint is by True Value and the color is called Sanguine.  I love how saturated the color is, without being too in your face.  Definite progress.


(Notice the little photo-bomber with the glowing eyes in the bottom picture.  That's Bron, one of our cats.)

But the real changes started happening when we ripped out the carpet in most of the house and replaced it with laminate wood flooring.  We used Pergo (I believe the color was Red Jatoba, but it has now been discontinued), and Mr. M. installed it himself over several weekends. I didn't have much to do with it other than try to play DJ and dance around the house while he worked in my own private 'the ugly carpet is gone' celebration.  Ah, I can hear 'This is How We Do It' playing in my mind now....


Add in some new chunky jute area rugs, trying my hand with pattern-mixing in my throw pillows, and the addition of a chair/ottoman, and that pretty much brings us up to where we are today. 


I still have a lot of ideas for this room. The mauve blinds that came with the house could stand to be replaced. I've always thought the built in shelves around the windows could be a cool upholstered bench, the off-white curtains could stand to have a little more flavor, and I'd love to find some fun lampshades to flank the couch.  But I've come a long way from crying about this room.  And as for the two different ceilings,  now that the room is filled with things that I love, I hardly notice them anymore! 

What room transformations have you done to your home?  I'd love to hear about them!

Linking up at