Showing posts with label tablescapes. Show all posts

Sunday, April 20, 2014

Easter Tablescape


Happy Easter guys!  Hope you're having a great holiday, and remembering the reason we celebrate it :)

We are hosting Easter dinner, so I thought I'd pop in quickly while my ham is busy cooking away to show you my Easter tablescape.


As I've mentioned before, I don't go too crazy with holiday decorating.  I'd rather spend my limited time and money on decor that can be used longer than the few weeks leading up to a holiday.  I am branching out and adding some holiday items here and there, but I don't have any Easter decor.  However, you know I love a pretty table, so my goal was to create one with things that I had on hand.  Since the table is black and I have plenty of gold, I thought I'd put together a fun black, white and gold table.

Which reminds me.......remember a few months ago on Instagram when I asked you guys whether I should buy the gorgeous Nate Berkus black or gold tray that I found at Goodwill?


The correct answer was both, people!  
I would have loved to have that gold tray in my tablescape....I'm so sad I didn't bring it home.

What, you don't follow me on Instagram yet?!  
Please do, I obviously need your help.

Now on to the rest of the eye candy...


Happy Easter!

Linking Up At

 photo signature_zps64b784cd.jpg

Wednesday, November 27, 2013

Tablescape Mania

Related Posts Plugin for WordPress, Blogger...
Alright, guys.  I know that I've been killing you with tablescapes lately.  But I have one more to share....

I mean, it's Thanksgiving week.  What do you expect me to post about? 

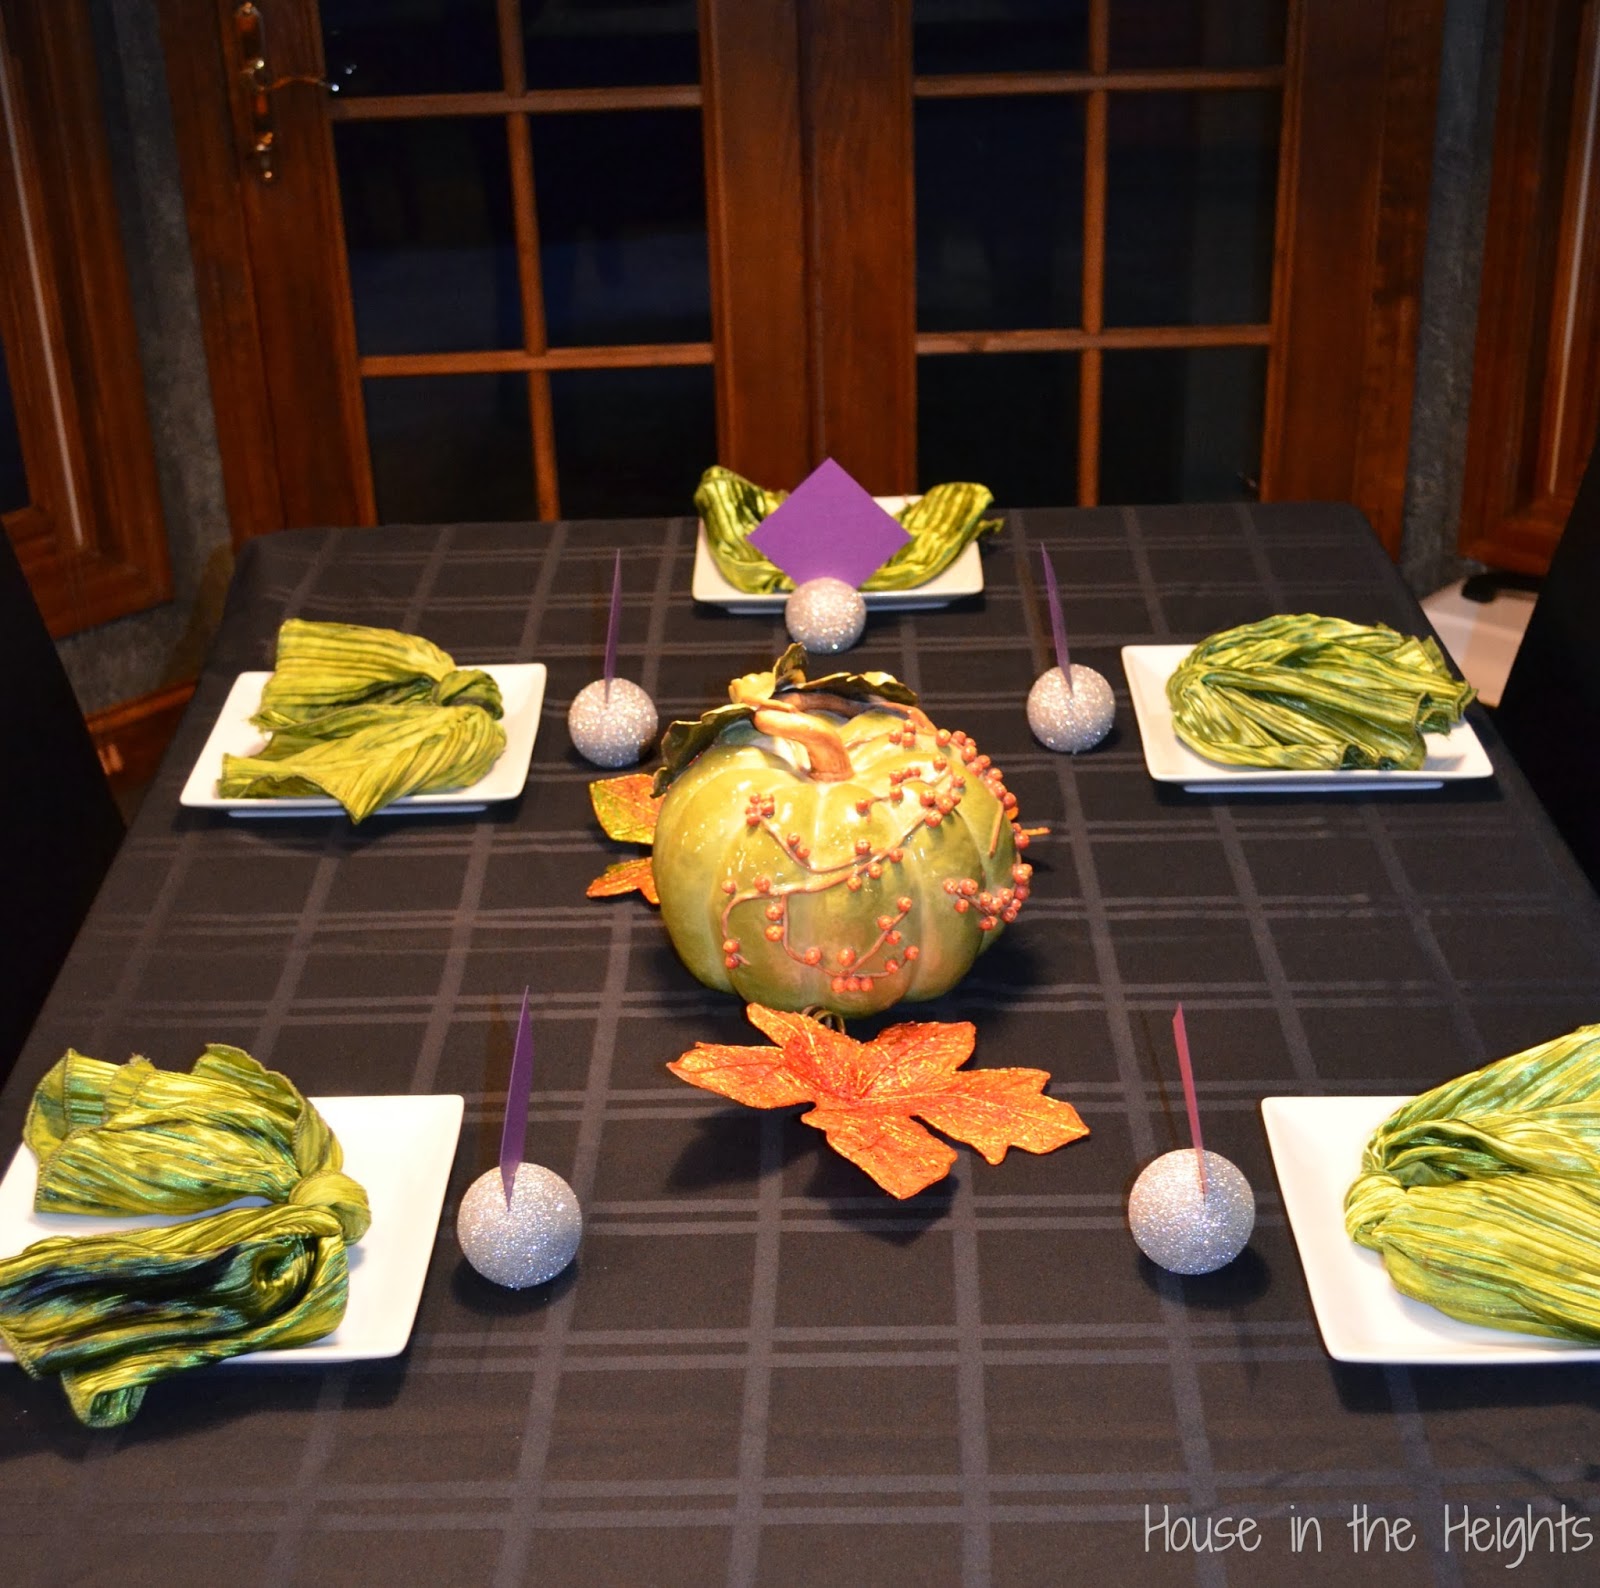
I was super excited when a friend asked me to help out with creating place cards for her Thanksgiving table. I mean, I'm used to coming up with ideas for my own house, but to do it for someone elses' was exciting!  It's actually what prompted me to get moving on my Sparkling Place Card Holders inspired by a set that I saw at Pottery Barn.  

I went over today to help put it all together, and thought it would be fun to show off the final result!  Here's the main table...


And the overflow table..


I love the purples and the greens.  Such fun and unexpected choices for Thanksgiving!  

Have a great day!

 photo signature_zps64b784cd.jpg

Monday, November 25, 2013

Adding Some Sparkle to the Table


Hey there!  Hope you had a great weekend!  I certainly did!  So great that I kind of feel like I'm already on Thanksgiving break...which is not the case! I can't stop thinking ahead to the festivities scheduled later this week, and keep forgetting that I have a few more days of real life to get through first! 

If you read last week's post about what I'm loving right now, you know that I've been admiring these jewel encrusted spherical place card holders from Pottery Barn.  But even though they are on sale right now, I would need to buy two sets to fill out my eight-person dining room table. I can't justify spending over $50 on place card holders, so I've been brainstorming ideas to make a set of my own.


Initially, I planned to coat Styrofoam balls with spray adhesive, cover them with black glitter, and then adhere some tiny jewels on top. Which probably would have worked.  But then, I remembered that I had a whole container full of  some of my favorite things on standby for Christmas......shatterproof, glittery, Christmas balls! I bought a container of 41 of these for about $9, so using 8 of them as place card holders ends up costing about $1.75. 

You'll soon be seeing these in various colors all over the house.  I fill vases with them, put them on the tree, and use them in every other way I can think of!

Turning these Christmas ornaments into place card holders was so very easy.  I used a small hand saw to cut off the very bottom of the ball, allowing it to sit flat..


...and then used the same saw to cut a slit in the very top of the Christmas ball, so that the place card can slip right in there.

This extreme close-up make it appear as if a lot of the glitter was removed when I made my cut in the top of the ball.  In person, that's not the case at all. 

I finished by adding in a simple place card that I drew myself using a metallic marker and ink pen. I love that you could insert any type of place card that you like! I'm loving how it look as is, so I'm going to hold off on adding jewels on top for now.  I think doing so might be messing with a good thing.


 photo signature_zps64b784cd.jpg

Wednesday, November 20, 2013

Holding at Thanksgiving (Holiday Tablescape)

Related Posts Plugin for WordPress, Blogger... A bunch of my fellow bloggers have been posting fabulous Christmas decor and craft ideas for the last few weeks.  And while a part of me is totally jealous, I'm just not ready to go there until after Thanksgiving has passed.  I'm holding at Thanksgiving for now....sort of like how I'm holding at 29, no matter how many 29th birthdays I need to have in order to stay there (3 so far).  Eventually I'll need to give it up and move on to the next great thing, but for now Thanksgiving (and 29) are working for me!

So as part of my Thanksgiving excitement, I caved and created a Thanksgiving tablescape this week.  Why do I say 'caved', you ask?   Well...because I'm not hosting Thanksgiving.  So I didn't really need to create a table at all.  But it just looked like so much fun, so I went for it!


Since this project was all about enjoying the process and getting a few fun pictures, I decided that I absolutely WOULD NOT spend a dime creating this table.  Which both limited and expanded my creativity. It was fun to figure out what I could create using only what I had on hand!

I started by fashioning a no-sew table runner, using the white curtain remnant that I used when re-covering a lampshade.  I simply draped it across my table, folding the raw edges underneath and topping it with my Thanksgiving centerpiece.  I did not have place mats that suited any of my color scheme ideas, so I decided to go without, and use only colored chargers. However, I don't have a full set of eight of either ice blue or silver chargers, so I decided to use four of each. 

Selecting dinnerware was easy, as I only have two full sets of eight place settings.  I chose my simple, transparent brown set, since it worked with the natural elements that I wanted to bring into the table better than my teal stoneware.   Napkins were also an easy selection, as I only own one set of cloth napkins. 

I also own only one set of napkin rings.  However I didn't want to use those, so I got a little creative with toilet paper rolls.  I cut a few toilet paper rolls in 2 inch wide sections, and then rolled each tube in a length of light blue tulle.  The tulle was wider than my toilet paper rolls, so I tucked the unfinished edges into the tube, and tied the tulle in place with a length of jute twine.  Once my napkins were threaded through the holders, I tucked in a few pieces of natural-colored ting-ting that I have had lying around for years.  


For place cards, I simply cut 8 rectangles out of two pretty blue and white scroll-design greeting card covers from a box of blank greeting cards in my stationary supply.  I wrote the names on each piece of card stock using a black ink pen and my best cursive, and then stuck each name tag to a wine cork, using two-sided tape.  Each place card nestled nicely into the 'nest' of ting-ting tucked into each napkin ring.


From there, I embellished the table with two silver candlesticks, each with a white mini-pumpkin on top, some votive candles in varying heights (using napkin holders for stands), and some more natural-colored dried floral items from the bouquet of ting-ting that I used in the napkin rings.


Considering I only used what I had laying around the house, I was pretty pleased with the results!  It kind of makes me want to have a dinner party this weekend, just to get some use out of this beautiful table.


Are you planning a Thanksgiving tablescape?  Would you create one just for fun, or am I the only crazy one?!

Linking Up At

 photo signature_zps64b784cd.jpg

Tuesday, November 19, 2013

Thanksgiving Tablescape Inspiration

Related Posts Plugin for WordPress, Blogger... Looking for some inspiration in setting your Thanksgiving table?  Look no further, these tablescapes are gorgeous, DIY inspirations that are sure to give you some amazing ideas!


(All images via Pinterest)


Gold DIY Place Cards and Thanksgiving Tablescape via The Inspired Room


Thanksgiving Inspired Gold Tablescape via A Pumpkin and a Princess


Silver and Gold Holiday Table via The Inspired Room


Fall Vignette Tablescape via Domestically Speaking


Pheasant Themed Tablescape via Corner of Plaid and Paisley


Green and Natural Thanksgiving Tablescape via Sophia's Decor

I'll be back tomorrow to show you my ownThanksgiving tablescape. Get excited!  It was completely free, using materials I happened to have on hand.

Yes...I designed a table, even though I'm not hosting Thanksgiving dinner.  It's my version of an enjoyable evening.  Nothing weird about that, right? 

 photo signature_zps64b784cd.jpg

Monday, November 18, 2013

Thanksgiving Centerpiece

Related Posts Plugin for WordPress, Blogger...
Can you believe that Thanksgiving is only 10 days away?!  I swear, we were just enjoying fall foliage and arranging mums and pumpkins on the porch!  

Although I'm not hosting Thanksgiving this year, I still want to have a fab Thanksgiving dining room table! I've stopped short of designing a full-on Thanksgiving tablescape...for now.  But I wanted to create a seasonal centerpiece, so when I stumbled upon a ceramic cornucopia for a few dollars at Goodwill, I knew I had struck gold!

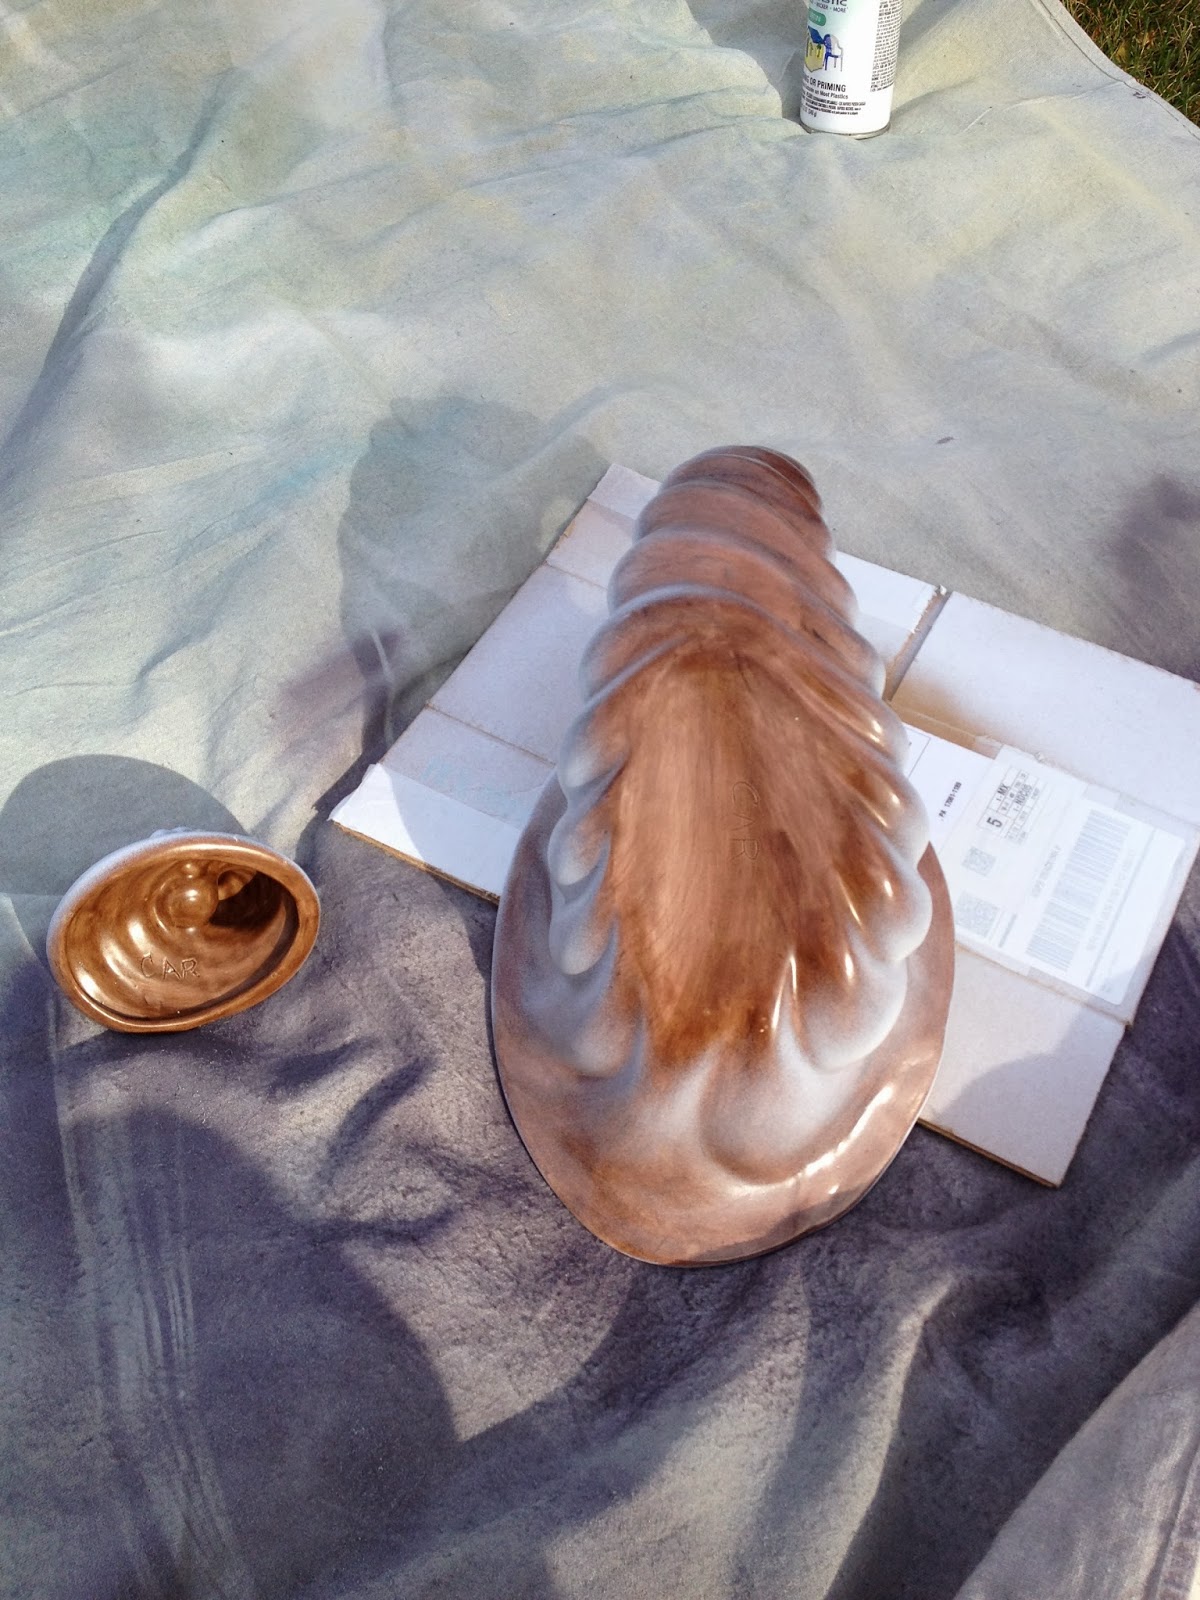
I forgot to take a true 'before' picture.  This is an 'in process' picture, that I took after I had already spray painted the top half white.

Based on the spotty glaze job and the initials CAR carved into the bottom of the cornucopia, I'm guess that this thing was someone's art class or pottery class creation.  Its original brown color was not very appealing, but the shape was great and I knew that I could totally transform it with spray paint.  

Another 'in process' picture.  

The item to the left is one of two cornucopia candle stick holders that came along with the cornucopia.  I spray painted them white as well,  but since they are designed to sit with the opening of the cornucopia facing down, they resemble swirls of vanilla soft-serve ice cream more than anything else.  I doubt that I'll use them.

Once my cornucopia had a fresh coat of white paint, I filled it with silver pine cones.  I had initially planned on making my own silver, sparkly pine cones, but when I found some for $5 at Homegoods a few weeks ago, I figured that I probably couldn't DIY them for less than that.  So I took the easy route!


I arranged the cornucopia, along with a pair of silver pillar candlesticks, on a silver tray that my mom handed down to me.  Then I piled on the pine cones, allowing them to spill out onto the tray.  


The result is a fun little seasonal centerpiece that will carry me through Thanksgiving!  Sadly, it will be put away in just a few weeks, once Christmas decorating begins.  But I think the fresh, white shape of the cornucopia will serve me well for Thanksgivings to come!


So thanks to CAR, whoever you are!  I bet you never thought your pottery class cornucopia would end up in blog-land!

Linking Up At
Give Me the Goods
Wow Me Wednesday
Get Your DIY On

 photo signature_zps64b784cd.jpg